Page 1 Page 2
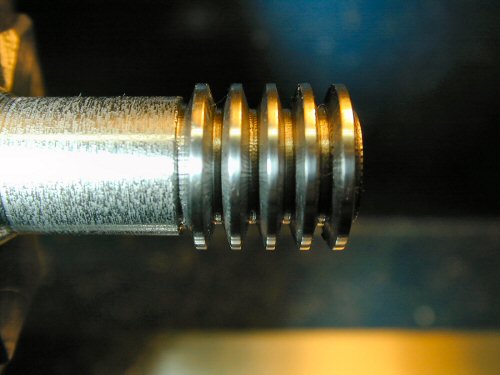
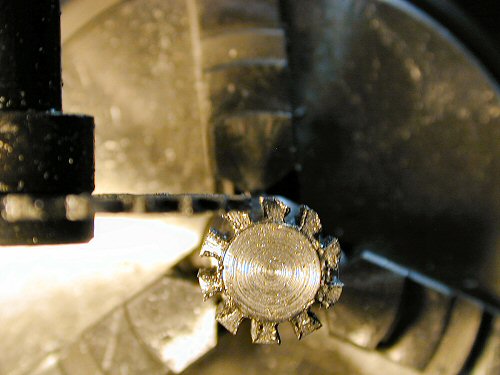
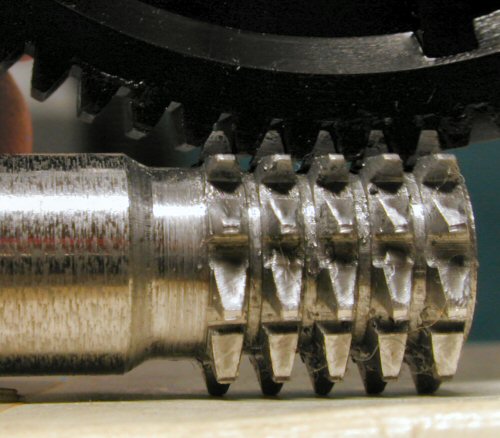
This is a closeup of the soon to be "Straight" Hob still mounted on the lathe. I made/discarded several using the suggested 40 degree home-made "thread cutter" tool before grinding it to much less than 40 degrees, closer to 33-36ish, to get the rings as you see in this picture. These mesh well with the metric Module 1 spur gears on my SIEG 7x12 mini-lathe. (SIEG Mini-mill gears are also Mod 1, by the way, so make spares before you break one?).
I *need* a 21 tooth gear before I can move on to making my ideal spiral gear cutter hob, as opposed to this straight gear cutter hob that requires an awful lot of tedium and time, repeatedly positioning the rotary table when cutting gear teeth with it on the mini-mill...
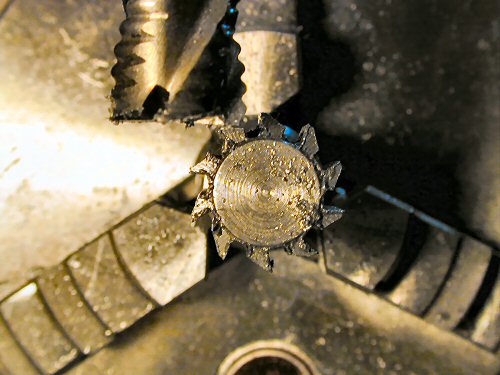
Here the work-in-progress hob is mounted in my LMS Rotary Table on my HF 44991 mini-mill. Unlike many R/T's, mine mounts on the right side of the mill's table instead of the left.
What I am doing here is using a 1/16" thick slitting saw to turn those 5 rings into cutting teeth. 10 slots to make 5 rows of 10 teeth each...
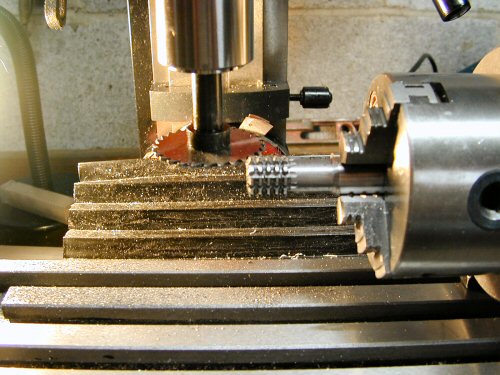
This shows how you must align the bottom edge of the 1/16" thick slitting slitting saw at or *slightly* above center of the hob in order to get a positive rake cutting angle on the teeth as you cut them.
I left a clearly visible center dot on the hob's end while facing it on the lathe, to aid in lining up the slitting saw here. In hindsight, I could have set the lathe cutter a bit low while facing and left a tiny knob in the center to put the saw blade's bottom edge down against, to much more easily align it to center height properly. But, I did just fine without it...
. I started to try to cut the relief angles behind the teeth as per the instructions in the excellent DVD "Making Gears The Easy Way" by Jose Rodriguez.
I quickly discovered that slitting saws do not like upward pressure (sideways to the cutting direction) and it was making for slow going.
. So, I removed the 1/2" slitting saw arbor from the 1/2" R8 collet in my mini-mill, and put in a 1/2" roughing end mill to do some no-nonsense relief angles on those teeth with a much more positive cutting action.
Remember the Slit-Saw cutting teeth with positive rake and the roughing end mill cutting relief angles procedure! I duplicate this procedure when making the spiral hob gear cutter and the "Woodruff" style keyseat cutter shown in use later on, but I do not re-document this part of making them...!
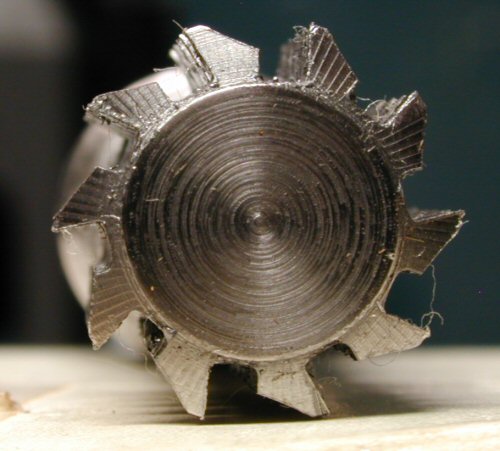
. I then returned the hob to the mini-lathe, carefully centered it in the 4" 4 jaw chuck, and carefully fed the same home ground flat tipped "thread cutter" tool that I used in creating this hob, into all the valleys between the teeth while turning the lathe spindle by hand to more quickly clean up the rough edges left on the teeth by the cutting and milling stages.
Stupidly, I then tried to clean it up with an oily shop rag, not a good idea with fresh sharp edges to grap and tear it.
Keep in mind this was only 5/8" diameter drill rod to begin with, and that these pictures are extreme close ups! :-)
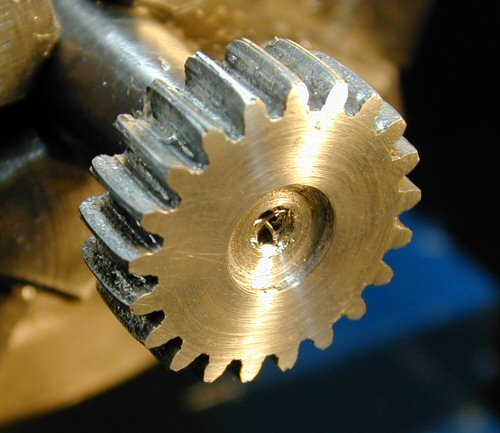
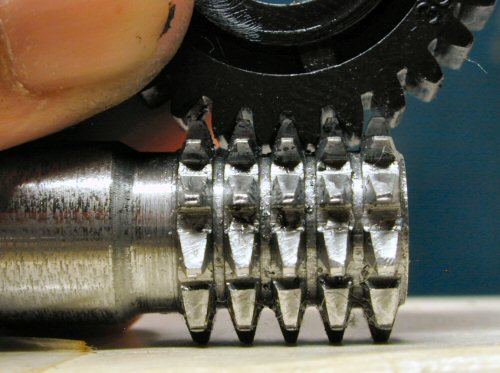
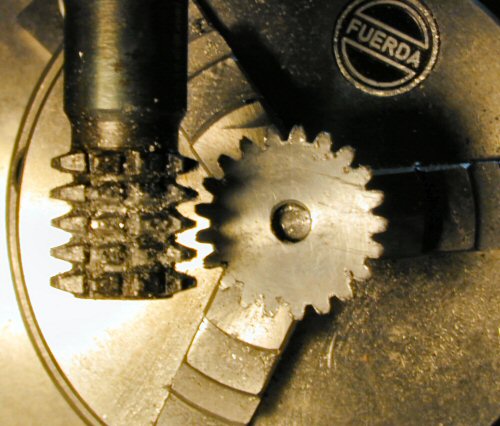
.I may not be an engineer (I just play one in my workshop), but I KNEW if the hob would not mesh well with my plastic lathe gears, neither would any gears I made using it! I don't know what the proper "pressure angle" of Module 1 spur gear teeth are supposed to be, but I can tell you as evidenced right here it is quite a bit less than the commonly advertised 20 degrees for standard U.S. spur gears.
Shown here is a nice mesh with a 30 tooth Mod 1 Sieg mini-lathe spur gear.
And shown here is a nice mesh with an 80 tooth spur gear. This and the above picture helped me to see why you may read only 3 rows are needed for small gears (above) but up to 7 for bigger gears, although 5 will do fine for what I need.
In this pic---->>
You can see how an additional 2 rows - one added to each end - would be
engaging/cutting as well on larger gears...
I then harden it using a Coleman propane camp stove burner and a Benz-O-Matic propane torch to get it red hot and then quench it in a coffee can half filled with used motor oil. I plan to document that part separately later on...
- - - -
.I scribed a circle slightly over the .9055" size dictated for
a 21 tooth "25.4 DP" gear on 5/16" aluminum plate, cut out around it on my band
saw, drilled and tapped the center to #12-24, and threaded it onto a bar
in the lathe and turned it down to proper size.
Mount in the R/T, center the Hob's middle cutter row on the gear blank's center height, and set the dividing plate up to do 21 divisions. I did first time all around at .015" deep, followed by 7 more times all around at .010" deep each for the prescribed total depth of .085" (2.157 / DP = Depth)
Thats 8 x 21 = 168 times I have to position the R/T
and make a cut. Tedious(!), but doing it this way causes the hob's teeth
adjacent to the center row to create the proper "involute tooth form" needed on
all the gear teeth. More small cuts going around many times is better
than a few times around with deeper cuts, which would give far less
well defined involute gear teeth...
- - - - -
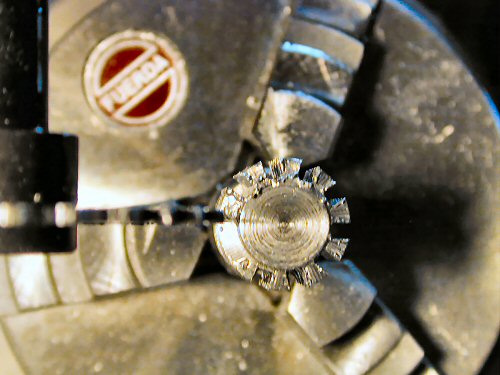
.Success! Finally I have a cleaned up 21 tooth spur gear that meshes very well with all of my plastic mini-lathe gears! I figure LMS did me a favor by being out of those 21 tooth gears for so long, as I'd have been the type to just buy one and thus not have done all this. I'm much better off this way. :-)
However, before I remove it from it's threaded mounting bar, I need a way to center it when I mount it in the chuck by itself to drill & ream it's mounting hole in the exact center...
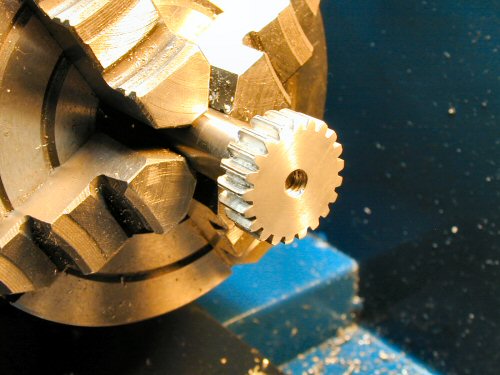
. So I cut a small "hub" in it that I can indicate against to perfectly center it in the 4" 4 jaw chuck.The "hub" is smaller than the 12mm mounting hole it will get after its properly set up in the chuck.
So, next will be to do the center hole, and then I still have create a way to cut 3mm keyways in little 12mm holes.
Once this gear is ready to go to work, I can cut a spiral hob with all the advantages of creating proper involute spur gear teeth as per above, but only have to go around with the R/T ONCE to cut starter gashes for the spiral hob to engage with, and it'll do a self feeding, spin the gear blank around action as it cuts the gear teeth. No more tedious, endlessly repetitive R/T positioning!.
Page 1 Page 2